
Okay, so the other day I decided my backyard was seriously lacking. I mean, we had a grill, but it was just… sad. I wanted a proper BBQ pit, something that screamed “weekend warrior” and “master of meats.” So, I figured, why not build one myself? Bricks seemed like the way to go – sturdy, classic, and I kinda liked the idea of playing with big-boy Legos.
Getting Started
First things first, I sketched out a rough plan. Nothing fancy, just a basic rectangular pit. I’m no architect, so I kept it simple. I measured out the space in my yard, making sure I had enough room to move around it and, you know, not set the house on fire.
Next up, gathering materials. I hit up the local hardware store and loaded up my truck with a bunch of bricks, some mortar mix (the stuff that holds the bricks together), and a few other tools. I felt pretty manly hauling all that stuff, I gotta admit.
- Bricks (lots of ’em)
- Mortar mix
- Trowel (for spreading the mortar)
- Level (to make sure things are straight)
- Shovel
- Wheelbarrow (for mixing the mortar)
- Safety glasses (gotta protect the eyes!)
- Gloves (keep hands not become rough)
The Build
I started by laying down a base. I dug out a shallow area and poured in some gravel for drainage. Then, I started laying the first row of bricks, making sure they were level. This was crucial – a wonky base means a wonky pit.
Then came the mortar. I mixed it up in the wheelbarrow according to the instructions on the bag. It’s kinda like making a giant batch of concrete cookies. I spread a layer of mortar on the base bricks, then carefully placed the next row on top, staggering the joints like you see in a regular brick wall. This makes it stronger. I kept checking with the level as I went, tapping bricks into place with the handle of the trowel.
Row by row, the pit started to take shape. It was slow going, and my back definitely felt it, but it was also kind of satisfying. Like, I was actually building something with my own two hands! I took my time, making sure each brick was properly set and the mortar had time to squish out a bit.
The Finishing Touches
After a few rows, when I get the height I am comfortable.I topped off the pit with a row of bricks laid sideways, creating a nice little * I left some gaps between the bricks on the bottom row for airflow, to keep the charcoal burning nicely.
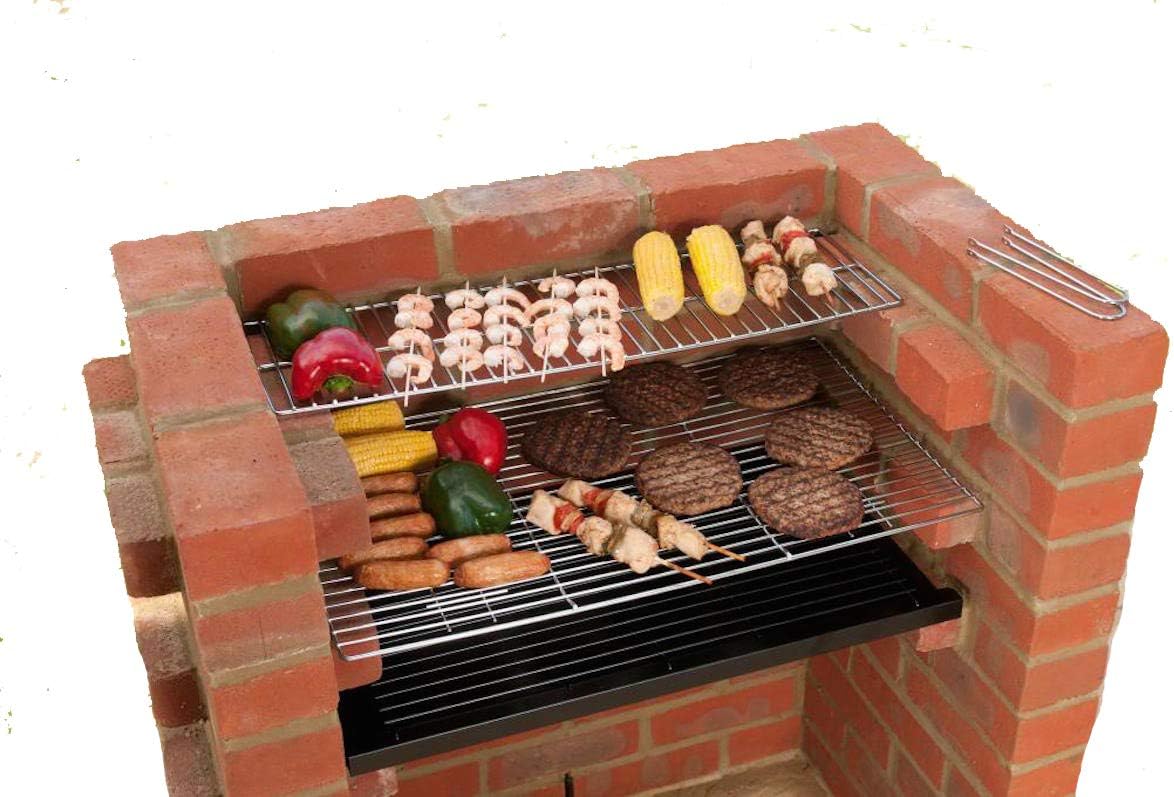
I let the whole thing dry for a couple of days, just to be sure. Then, I fired it up! I threw in some charcoal, lit it up, and grilled some burgers to celebrate my new creation.

It wasn’t perfect, mind you. There were a few uneven spots, and the mortar wasn’t exactly pristine. But you know what? It worked! And it felt awesome to cook on something I built myself. Plus, it looks pretty darn good in the backyard. Now, who’s ready for a BBQ?