
Okay, here’s my attempt at a blog post in the style you requested, detailing my fire pit project:
Alright, so I’ve always wanted a fire pit in my backyard. Somewhere to chill with friends, roast some marshmallows, you know, the good stuff. I finally decided to just go for it, and I figured, “Hey, I can do this myself!” I chose landscaping bricks because they’re cheap, easy to find, and look pretty decent.
Planning and Prep
First thing I did was figure out where this thing was going. I wanted it far enough from the house, trees, anything that could catch fire. Safety first, people! I marked out a circle on the grass with some spray paint. That was my guide.
Then came the digging. Ugh, the digging. I’m not gonna lie, this part was a workout. I dug out the circle about 6 inches deep, making sure the bottom was relatively level. I also dug a little trench around the outside of the circle, a few inches wide, for extra stability. That’s what I learned on YouTube anyway.
Laying the Bricks
The fun (but kinda tedious) part!
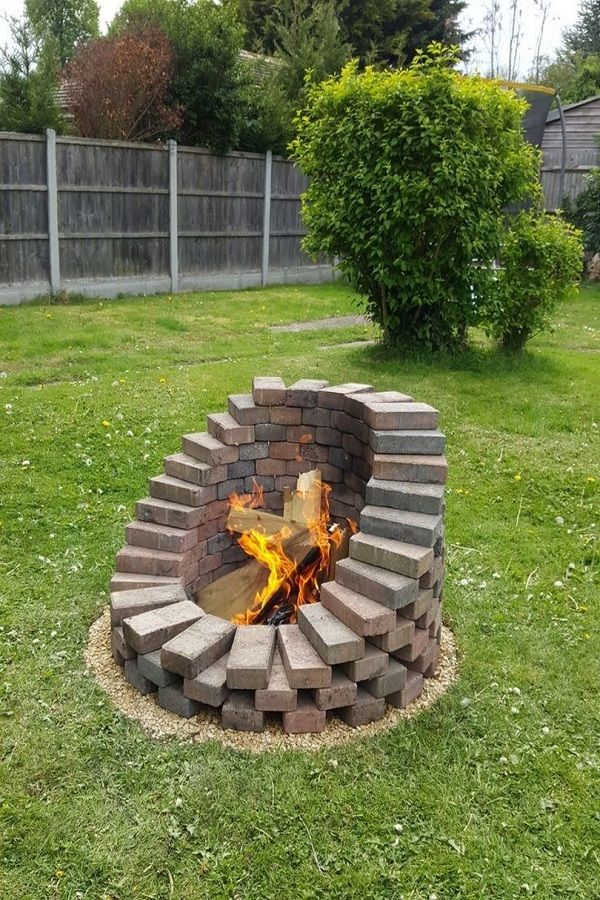
I started laying the landscaping bricks around the edge of the circle, fitting them together as tightly as I could. No mortar or anything, just dry-stacking them. It’s like a giant, round * added measure and to prevent grass from growing inside the firepit I started with a layer of sand.
- First layer: Just get them in place.
- Second layer: Stagger the bricks, like you would with a regular wall. This makes it stronger.
- Third layer: repaet second layer.
I kept going, building up the walls, layer by layer. I think I ended up with three or four layers. Make sure they’re kinda snug against each other, so there aren’t big gaps for embers to escape. I also sloped the walls slightly inward, just a bit, to help contain the fire.
Finishing Touches
Once the walls were up, I filled the bottom of the pit with some gravel. This helps with drainage and keeps the fire from sitting directly on the dirt. Some folks use sand, but I had gravel on hand.

And… that was pretty much it! I threw some logs in there, lit ’em up, and boom! Instant fire pit. Seriously, it was easier than I thought it would be, and it looks pretty darn good, if I do say so * total cost was around 60$, pretty good!
Now I’m just waiting for a cool evening to really enjoy it. Beers, friends, fire… can’t beat it. If you’re thinking about doing this, I say go for it! Just be prepared for some digging.