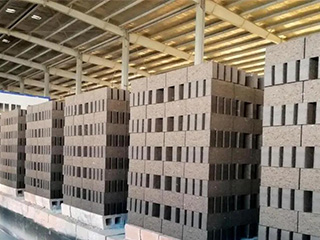
Kiln bricks are an essential component of ceramic kilns, as they provide the insulation and protection needed to reach and maintain high temperatures. Over time, however, kiln bricks can become damaged, leading to uneven heating, decreased energy efficiency, and potential safety hazards. In this article, we will explore tips and techniques for repairing damaged kiln bricks.
Identify the Damage
The first step in repairing damaged kiln bricks is to identify the extent of the damage. Cracks or chips on the surface of the brick can often be repaired with patching materials, while deeper damage may require replacement of the entire brick.
Prepare the Area
Before repairing kiln bricks, it is important to prepare the area. Turn off the kiln and allow it to cool completely. Remove any loose debris or dust from the damaged area, using a stiff-bristled brush or vacuum.

Choose the Right Repair Materials
There are several options for repairing kiln bricks, depending on the extent of the damage. Some common repair materials include:
1.Kiln Cement
Kiln cement is a heat-resistant adhesive that can be used to repair small cracks or chips in kiln bricks. It is easy to apply and dries quickly, making it a popular choice for minor repairs.
2.Patching Compound
Patching compound is a mixture of refractory materials that can be used to repair deeper damage in kiln bricks. It can be molded into the shape of the damaged area and then allowed to dry and harden.
3.Firebricks
For more extensive damage, replacement of the entire kiln brick may be necessary. Firebricks are specially designed bricks that are made to withstand high temperatures and are commonly used for kiln repairs.
Make the Repair
To repair kiln bricks using kiln cement or patching compound, follow these steps:
1.Mix the repair material according to the manufacturer's instructions.
2.Apply a small amount of the repair material to the damaged area, using a putty knife or trowel.
3.Smooth the repair material over the damaged area, using a damp sponge or cloth.
4.Allow the repair material to dry completely, according to the manufacturer's instructions.
To replace an entire kiln brick, follow these steps:
1.Remove the damaged brick, using a hammer and chisel or a saw.
2.Clean the area where the brick was removed, using a stiff-bristled brush or vacuum.
3.Apply a thin layer of kiln cement to the bottom of the replacement brick.
4.Insert the replacement brick into the kiln, pressing down firmly to ensure a secure fit.
5.Apply a small amount of kiln cement to the sides and top of the replacement brick.
6.Smooth the kiln cement over the sides and top of the replacement brick, using a damp sponge or cloth.
7.Allow the kiln cement to dry completely, according to the manufacturer's instructions.
Maintain the Kiln Bricks
To prevent further damage to kiln bricks, it is important to maintain them properly. Regular cleaning and inspection can help to identify and address small cracks or chips before they become larger problems. Additionally, avoid slamming or dropping items on the kiln bricks, as this can cause damage. Finally, be sure to replace any damaged or worn kiln bricks promptly to ensure the continued safety and efficiency of the kiln.
In conclusion, repairing damaged kiln bricks is an important part of maintaining the safety and efficiency of ceramic kilns. To repair kiln bricks, first identify the extent of the damage and choose the appropriate repair materials. Kiln cement and patching compound can be used for minor repairs, while replacement with firebricks may be necessary for more extensive damage. Be sure to maintain the kiln bricks properly to prevent further damage and ensure the longevity of the kiln. With proper maintenance and timely repairs, kiln bricks can continue to provide the insulation and protection necessary for high-temperature applications.
Additional Tips and Techniques
Here are some additional tips and techniques for repairing damaged kiln bricks:
1.Wear protective gear, such as gloves and a dust mask, when working with kiln repair materials.
2.Apply kiln cement or patching compound in thin layers, building up the repair gradually, to ensure a secure and lasting repair.
3.Allow the kiln cement or patching compound to dry completely before firing the kiln again.
4.For larger repairs or replacement of multiple bricks, consider hiring a professional kiln repair technician to ensure proper installation and safety.
5.Regularly inspect the kiln bricks for signs of damage or wear, such as cracks, chips, or discoloration.
Conclusion
In conclusion, repairing damaged kiln bricks is an essential part of maintaining the safety and efficiency of ceramic kilns. By following the steps outlined in this article and taking proper precautions, you can effectively repair minor damage with kiln cement or patching compound, or replace entire bricks with firebricks as needed. Remember to maintain the kiln bricks properly to prevent further damage and ensure the longevity of the kiln. With proper care and attention, kiln bricks can continue to provide the insulation and protection necessary for high-temperature applications.
Contact: Mgr. Han
Phone: 0086-13589497465
Email: 1255953279@qq.com
Add: Industrial Area of Lingzi Town,Zichuan District,Zibo City, Shandong,China